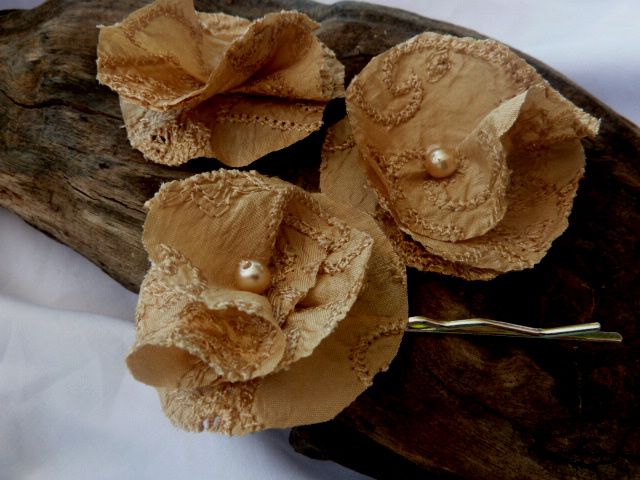
You might remember in one off my previous posts where I was given a quantity of shoe clips along with lots off delicious silks and lace from my dear friend Sue. Well I have been playing with them when I can and have made some shoe clips and a bobby pin to match. Now the question is should they be sold as a set or separate. This is where I would like your input if you would be sweet enough to tell me what you think. These are made from a gorgeous golden embroidered silk and I popped a little pearl into the centre. I might even be tempted to give one of my readers a set, just to say thank you.
Showing posts with label silk bow. Show all posts
Thursday, September 22, 2011
Friday, September 16, 2011
I Just Had to Play with My Goodie Bag
Yesterday I was given not one but two large bags full of beautiful gold raw silk made by James Hare, burgundy, ruby red, cream and baby blue slub silk and ooddles of beautiful cream and ivory lace. At the bottom of one of the bags I found a mountain of shoe clips. All this gorgeous treasure belonged to a friend of mine who ran her own bridal shop in the 80's and due to a house move decided that I was the one to receive the bounty. Whoo whoo am I the lucky one.
Yesterday I spent hours playing with all these goodies and my brain went into melt down and I could not decide what to make or even where to start, and with what, Shish! Today though has been a little better and I am trying to focus on one thing at a time. Meanwhile nothing else is getting done but I don't really care, housework can go take a hike for the moment.
So my first atttempt was these lace rosette shoe clips. Then I made a few pom pom type flowers out of the gold silk and finally a pair of chocolate bows which are perfect for a certain pair of shoes if I can only find them!
Yesterday I spent hours playing with all these goodies and my brain went into melt down and I could not decide what to make or even where to start, and with what, Shish! Today though has been a little better and I am trying to focus on one thing at a time. Meanwhile nothing else is getting done but I don't really care, housework can go take a hike for the moment.
So my first atttempt was these lace rosette shoe clips. Then I made a few pom pom type flowers out of the gold silk and finally a pair of chocolate bows which are perfect for a certain pair of shoes if I can only find them!
So, I wish you all a happy weekend and see you soon.
Me again just to let you see the lace ones:) Thanks Sue for showing me how to make these gorgeous little bows:)
Labels:
friends,
lace,
shoe clips,
silk bow
Tuesday, May 17, 2011
Bow Haircomb Tutorial + Giveaway
I was recently asked to make a bow haircomb similar to the one above for a bridesmaid and thought that you might like to try one for yourself. You dont need much in way of material but silk or chiffon I find works best. I used a vintage dupont slubbed silk for this one.
You will need
Material scraps
1 clear haircomb
pair of scissors
needle & thread to match your material
and a cute button
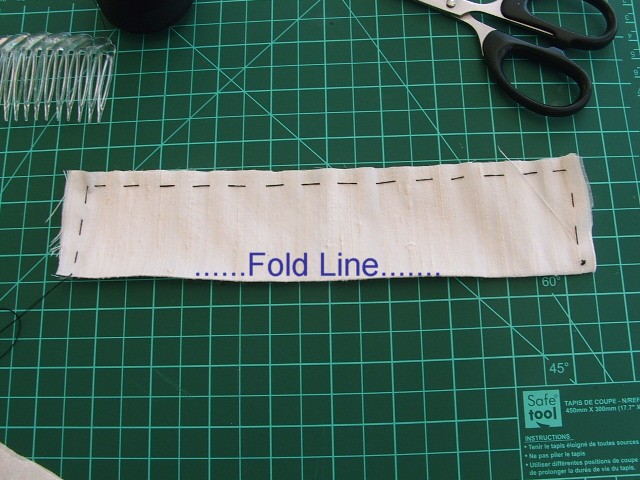
ok, cut out two pieces of material 24cm x12cm - ( 9" x 5"), and one piece 9cm x 5cm (3.5" x 2") fold the two large pieces of material in half length ways so they both look like this, with the fold at the bottom.
Then using matching thread ( I used black here so you can see it easier) tack all the way round but don't cut of the thread as you will need it again in a minute. Pull the thread with the needle still attached and gather until you get it to look like a petal:
You will need
Material scraps
1 clear haircomb
pair of scissors
needle & thread to match your material
and a cute button
ok, cut out two pieces of material 24cm x12cm - ( 9" x 5"), and one piece 9cm x 5cm (3.5" x 2") fold the two large pieces of material in half length ways so they both look like this, with the fold at the bottom.
Then using matching thread ( I used black here so you can see it easier) tack all the way round but don't cut of the thread as you will need it again in a minute. Pull the thread with the needle still attached and gather until you get it to look like a petal:
Now stitch back through from one end to the other until the petal is as tight as you can get it, you can adjust the pleats as you go, repeat this with your second strip.
Place the two halves together back to back and stitch together making sure they are secure.
Take your small piece of material and fold the top and bottom half to the middle and then fold again so you have a strip that measures 15mm (1/2").
Place this central over the two pieces you lovingly stitched together earlier and then turn over and tuck one side under and keep it tight and then stitch to secure.
Nearly done all you have to do now is add your cute button to the centre band and then attach this to your haircomb and there you have it. I added a beautiful little rhinestone vintage button to finish.
Now that I have put this together this with the black thread I won't sell it and I have no intention of unpicking it all to start again. So here's the plan.
GIVEAWAY
If you would like to have this for yourself or for a friend. All you have to do is this.
1.Follow my blog and then tell me why you would like it for yourself and where would you wear it, and if for a friend, why you think they would like it.
Now how easy is that? I will run this for a week (ends on the 24th May).If nobody enters for it I guess I might have to take the black stitches out afterall, save me the trouble please, I don't like unpicking:) I will choose the best story. If you do decide to make one I would love to see it.
ps: the black stiches will not be seen when worn, just thought I would mention that.
Just made this one with organza this time and doubled the layers. The second set of petals I made the same length and reduced the width by 15mm (1/2") so it would sit inside the other.
Labels:
bow haircomb Tutorial,
bridesmaid,
giveaway,
rhinestone button,
silk bow
Subscribe to:
Posts (Atom)