Showing posts with label French. Show all posts

Sunday, September 13, 2020

Searching for the History of a Bisque Socket Head Dolly Faced Doll - Armand Marseille

The owner of this doll was born in  South of France in 1897 and her name was Charlotte Timbert.  So lets say Charlotte would be 4 or 5 when she was given the doll that would take us to 1901 or 1902.  So when was the doll made? 

I am thinking perhaps any time from 1885 when 
Armand Marseille started  producing  these dolls  up till the 1950's but the jointed bodies were bought in from I believe Germany


Her grandson is a neighbour of mine and  a few weeks ago he came across a box in his attic and this little lady was inside. She is an a bit of a state as you can see


She has real hair  and her eyes are gorgeous too, with  the cutest little rosebud mouth and that dimple don't you just love her?

Gorgeous little boned Corset with tiny glass buttons to which I assume a skirt would have been attached. Sadly no clothes were found  in the box.
Corset was made by Maison Miege Corsets


The little shoes are leather but one is badly damaged and they are tied with ribbon and one shoe has a tiny pompom. Socks are still intact.


Back of her head is marked with DEP 8, there is a smiggin of a label but nothing to be seen there..  She is also in need of  a good hair do and some dental work!

If you have any information that would help me identify her that would be great. I am trying to find out what clothes she would have worn, all takes time but little by little.

Tuesday, August 9, 2011

She Wears Buttons - Giveaway - Win a Pendant or Ring


Yesterday I passed a brocante which is basically second hand/vintage items in an upmarket version off car boot sales. I don't go to them so much as they can be quite expensive, but as I was passing I thought to myself, might as well pop in and have a quick look. I found the buttons above (a full card off 12 vintage mother of pearl buttons) beautifully engraved and gorgeous colours when the sun hits them, little splashes of greens and pinks, made in the late 1930's and in mint condition. I haggled my socks off but lost and I had to go borrow some cash from my SIL to buy them but so very pleased I did. I love them and have great plans for a few of them. Definately going to make a pendant or two:)

Here's my first ring. I added another small, also beautifully engraved vintage bronze button to the centre and then popped a soft pink pearl bead in, perfect fit. I am pleased with the result, what do you think?  I have it listed in my shop and if you want to see more pictures, click here.  


A few more for my collection
 I thought it would be fun for one of my lovely followers to win a ring or pendant made with one of my new buttons. All you have to do is this. Follow my blog (please) and leave a comment as to whether you would like a ring or pendant and I will pick a winner at random on the 22nd August.  Told you it was easy. A little something extra, if you purchase any item from my shop adding Bloglove will give you free shipping. Just thought I would mention it.

Thursday, May 5, 2011

Trapped in Ice with a Lemon Sorbet


I decided to try and make an ice ring with my dried flowers unfortunatley some of the flowers floated to the wrong side and left an empty space,  but you could drape a few mint leaves or petals to cover the gap, nevertheless looks quite pretty. I used a rice ring for the mould but have also tried it with two bowls one placed inside the other which makes it easier to place the flowers. Looks great on the dinner table and I filled this one with a home made lemon sorbet.


Monday, May 2, 2011

Rose Petals Happily Forever +

 I swear that it was end of May last year before I started to dry the rose petals but this year we have had exceptional hot and sunny days and the roses are out and I now have to get cracking to start collecting and drying them. I have tried many ways to retain the colour and smell over the years and there are several ways to do this. So I thought I would show you how I do mine. Anyway I will give a small bag (decent size) of my pot-pourri to the first 3 people to ask for it. All I ask is that you pay the postage of 3€ worldwide offer. 3€ is the standard int.Standard package.


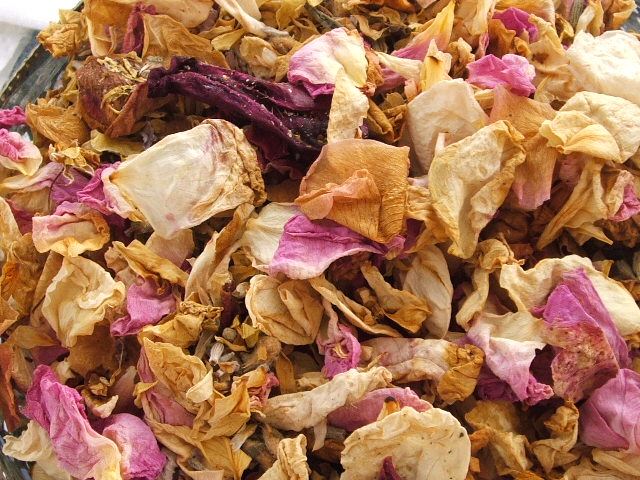
For example if I am drying rose petals for pot- pourri then I scatter the rose petals on a microwave safe plate. Microwave for one minute. If the petals are still damp, microwave at one-minute intervals until dry. They come out looking like this, as you can see the white has gone brownish but that's fine as they will be going into bags and the smell is not lost. I have my own blend for pot-pourris and if you would like it then just ask and I will give it to you.
The red petals shown below I dried in the microwave (this one took 3 minutes) and you can see it progressivly getting darker becoming almost black.  Not a good choice for throwing at the Bride & Groom as any chance of dampness and they will stain clothes quicker than you can say Jack Rabbit. You can see the stains on the plate on the 3rd picture.
1 minute in microwave

2 minutes
 
3 minutes and dry
You can also dry the petals by spreading them onto tissue paper or on wire screen. Put them where they will get plenty of ventilation but not be disturbed by breezes. An enclosed patio or spare room is a good choice. Stir them very occasionally to dry evenly. This takes several days to complete. I don't recommend drying them in direct sunlight as I found out to my cost they lose their perfume.
Pressed petals. If you have one or two special roses from a gift bouquet, you can press the petals. Pluck the petals out and put them between paper towels. Put a book or board on them to press the petals as they dry, alternatively  use a flower press I have successfully dried many varities this way. Great for making your own cards or for creating a picture.


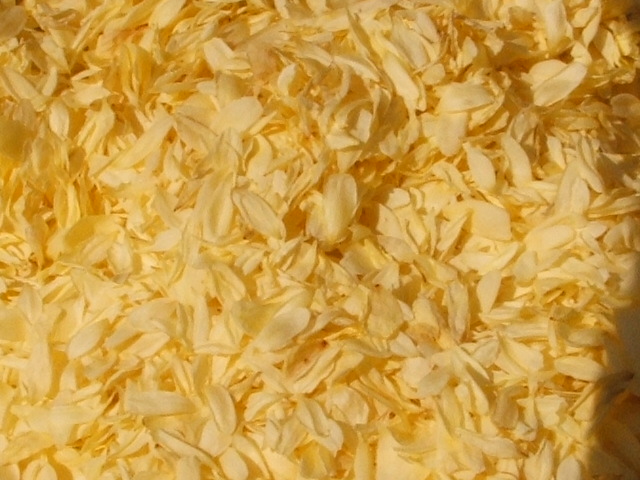
  To get flat petals that will also retain their colour, lay onto a linen sheet placing them in a single layer. For petals with a little curl to the edges, lay them the curling side down but pull out the curl as best you can and just pat them into place. Bit fiddly but worth it, cover the petals with another sheet and gently tamp down. Leave them alone for a few days and they will dry mostly flat and without much shrinkage. You will need a reasonable sized area to achieve this if you have a lot. As you can see they have stayed white. These are then perfect for throwing at the Bride & Groom.


Depending on what colour the roses are will determine if you want to dry them or not. White roses generally dry to a cream but use above method and they will stay white. Yellow roses dry beautiful,below are Rosa Banksia dried and still very yellow. Pinks & rose coloured generally dry well and some reds will dry so dark they look black as I mentioned earlier.


 Right must dash and hope the above helps if you were thinking of trying it for yourself. And if you have another way of doing it I would be happy to hear it.

Friday, April 29, 2011

Acacia Flowers In Tempura Batter


The Poplars are now shedding all their seeds which is like watching a  fluffy snow storm  drifting across the garden, it floats around and it tickles when it lands on you. Next to them are the Acacia's with their beautiful clusters of white hanging flowers and a smell of  warm honey in the air for days to come. Time to eat some!

If you have never tried  Acacia flowers in a tempura batter before then I recommend it, it has a delicate flavour of honey and leaves a great  taste in your mouth and you keep going back for more. Great with cream or a dusting of icing sugar or dipped in chocolate.

So if you happen to have an acacia tree close by pick a few flowers and give it a go.

For the batter I used:

•1 egg
•1 cup ice water/cold water
•1 cup all purpose flour, sifted

Beat an egg in a bowl. Add the iced water.  Add sifted flour and mix lightly. Be careful not to overmix the batter. Then deepfry until golden brown. Delicious, let me know if you try it out would love to hear what you try it with. Enjoy!!


Friday, April 15, 2011

Monograms From Days Gone By


One of the oldest forms of identification in the world, and is still widely recognized and used today? The Monogram.

A monogram is a symbol that is created out of letters. This is deemed as a very personal item as the monograms are usually the initials of the person who owns the item.


I love them and I only ever succeeded to do one successful monogram and it took me roughly about 17 hours as I unpicked, redid, unpicked again till my fingers screamed at me to stop. I fully intend to do another but have no idea when and hope my eyes last out long enough to create another. A professional could have done it in half the time I am sure.

 
Today’s technology allows you to create monograms on a machine but for me,  although very clever  it doesn’t sit right with me, although a friend of mine has created some beautiful pieces so perhaps I have the wrong attidute. I guess I am a romantic and when I think of the young victorian girls sitting for hours creating works of art that we can still enjoy today and for many years to come I hope. Plus, I want to say I did that! and not my machine ( anyway I don’t have one and probably never will)


So when I see vintage monogrammed sheets at vide greniers and brocantes, and I can afford them I have to have. Thought I would let you see just  a few of mine. !


The book above has some fabulous examples and shows you all the stitches so perhaps before my dotage I will get down to trying again.


Monday, April 4, 2011

Chateau Dumas Workshop Winner Announced for 2011

Delighted to announce that the winner for the Chateau Dumas Workshop giveaway 2011 is Louise Giordano. She will be joining us in the Festive French Country Workshop.
Congratulations Louise and really look forward to meeting you at the Chateau.  Here is a taste of what's in store for Louise.

 FESTIVE FRENCH COUNTRY WORKSHOP

with Anna Corba and Ros Badger


9-16 OCTOBER 2011


From gorgeous handmade presents to original designs for tree and home decorations, this rewarding and well-planned week of joyful creativity is the ultimate Christmas holiday workshop led by British textile expert Ros Badger (http://www.rosbadger.com/) and US paper artist Anna Corba (http://www.annacorbastudio.com/) both authors of successful books.

Drawing on Anna’s expertise in crafting with paper and Ros’ skill with textiles and found objects, you’ll be inspired during this innovative workshop to make a variety of unique pieces to keep or give to friends and family. You’ll discover the unexpected value of ordinary objects and how easily they can be turned into desirable pieces, and how scraps of vintage textiles and notions can be upcycled in new and interesting ways.

Projects lined up for this madly creative week include journals, notebooks, tags, garlands, cards and keepsakes made from vintage and new paper which is enhanced and embellished through tea-staining, collage and beeswax glazes. The fabric-based activities will range from fabulous Christmas stockings, advent calendars, bags of all kinds and charming gift ideas from pincushions to tea cosies and more.

Handmade gifts for friends and family (and original ideas for wrapping and presenting them), tree and home decorations and delicious recipes for holiday entertaining are all part of the week. Patterns, templates and instructions guide you at every stage, helping you to progress quickly through your projects with Ros, Anna or one of the assistants always on hand. There’s even a recipe book for you to take away with you with festive drinks and scrumptious snacks from around the world.

Sessions take place in the large, well-equipped studio which is stocked with a full range of materials, many of which are included in the cost of the workshop. There is an assortment of tools and equipment from sewing machines and irons to and eyelet tools and glue guns for your use. Additional materials are available to buy and some of the creative projects will cost extra.

No special expertise or experience is necessary to take part in this workshop.

The Essentials

The price of 1450Euros (non-participating partners: 950 Euros) includes .

•7 nights Chateau accommodation and all meals

•5 days of tuition for 7 hours a day

•Transport to the market and hat factories

•Basic materials and use of equipment

•Some creative projects will cost extra

The workshop will run with a minimum of 8 and a maximum of 14 participants


Wednesday, May 19, 2010

Loving May

I love irises and have quite a few in my garden and at this time of year they add such a fabulous dash of colour. I remember the first year they flowered I immediately cut  a dozen and proudly placed them into a large vase and although they looked great within 40 minutes my room smelt like it had been used as a toilet by every cat in the neighbourhood. I now admire them in the garden and that's where they will stay from now on!

Sunday, April 25, 2010

Lavender Giveaway Winner April

April the 15th was the finish date of my giveaway for a hand monogrammed lavender sachet.. 33 people entered and the winner was Karen.  I sent it off to her and  she has now received it and  sent me a picture of it in pride of place.  Thank you  for letting me see it in it's new home.
Related Posts Plugin for WordPress, Blogger...