Wednesday, May 25, 2011

Feature with Debger Designs + 5 Giveaways


I met Debbie van Tonder owner of Debger Designs in November 2009 in the Etsy forums, she was like all new shop owners and was anxiously waiting for her first sale, we got to chatting and we have kept in touch ever since. Debbie makes beautiful beaded woven bracelets and she did not have to wait long for her first sale.
She soon started to get enquiries for her patterns which at the time she never offered in her shop but by Febuary 2010 she listed her first pattern and has not looked back since
 She opened a second shop in August 2010, with fun beading patterns for young people interested in learning beading techniques but wanting something different to grandma’s flowers, these are exclusively Peyote patterns. (Peyote is a beading stitch, which is woven by hand). http://www.http//en.wikipedia.org/wiki/Peyote_stitch
.

Again she started receiving several enquiries for her patterns to become available in Loom and so Loom Tomb was born.

www.etsy.com/people/LoomTomb.


Both Debbie and her daughter, whose favourite sport is gymnastics, are both qualified gymnastic judges and have made many trips around the country judging events.

Debbie was recently approached by the editor of Perlan Poesie magazine and was asked to make an exclusive bracelet for them, which will be available on June 10th. It doesn't get any better than that, congratulations Debbie.


Everyone loves a success story and this certainly is a good example of one. Well done Debbie and thanks so much for your generous giveaway. Finally her pet Nibbles wanted to get in the picture so here she is. Good girl Nibbles!!!


Debbie is going to giveaway 5 patterns of her bracelets, which you can choose, from either of her shops.


Rules for entry


1. Please follow my blog
2. Go to her either of her shops and choose which bracelet you would like to win and post your choice along with your comment.
3. You can enter as many times as you like
4. If you share this on Facebook or Twitter add another comment
5. If you blog this giveaway add another comment
6. Lastly, how many beads do you think it takes to make the Mardi Gras bracelet? The 5 closest guesses will win a pattern of their choice.
7. Giveaway is open worldwide and will end on the 10th June, so pop back in and see if your a winner.
8. Good luck with the guessing!!!


Monday, May 23, 2011

All Aboard choo choo


Perfect day yesterday as the weather turned cooler decided to take the little ones to the Minature Trains in Gailliac.  Kids absoulutley loved it and we spent a good hour going round as  it covers approx. 200m2. 1kl of track and 20 or more different trains and over  200 hundred wagons.

It was like a watching  a ballet as it is so well orchestrated that all the  trains can run simultaneously. They had  automatic barriers, and all the sounds of  the trains and whistles, a  beautifully built  model church with a wedding taking place:) houses being constructed, and lots more. As in reality the TGV have their own  lane. An old telephone exchange cabinet was recycled to manage all automation with  hundreds of electrical relays switches.  The guy running it looked up as we entered and beamed at us and then ran over to his control box and you could tell he was having great fun.


On the way  home we happened on a  Vide Grenier  (attic sale) and the kids  decided that they would like to have the face masks. Stevie choose the miserable clown and Poppy the miserable old man and I think they are truly horrible ( the face masks that is)!!!!! Was good fun
Lots more pictures on their site if you want to see some more http://trainminiaturegaillacois.o-p-i.fr/galerie.html

Thursday, May 19, 2011

Erik Johansson Photographer


A friend recently sent me some pictures taken by Erik Johansson. I was blown away by his stunning work. A professional photographer and retoucher from Sweden, who works mostly  on personal- and commercial projects.  He states that "For me photography is just a way to collect material to realize the ideas in my mind. I get inspired by things around me in my daily life and all kinds of things I see. Every new project is a new challenge and my goal is to realize them as realistic as possible"

I just love his work and want to capture and share his work with anyone who enjoys photography taken to a new level. Keep them coming Erik. Here are a few more fabulous examples of his work. The are all so very clever, and  I really love the one where a shirt is being pressed with the guy inside, it is brilliant. If you click on his name above it will take you to his website and blog where you find more of his work.


Tuesday, May 17, 2011

Bow Haircomb Tutorial + Giveaway

I was recently asked to make a bow haircomb similar to the one above for a bridesmaid  and thought that you might like to try one for yourself. You dont need much in way of material but silk or chiffon I find works best. I used a vintage dupont slubbed silk for this one.

You will need
Material scraps
1 clear haircomb
pair of scissors
needle & thread to match your material
and a cute button

ok,  cut out two pieces of material 24cm x12cm - ( 9" x 5"),  and one piece 9cm x 5cm (3.5" x 2") fold the two large pieces of material in half length ways so they both look like this, with the fold at the bottom.
Then using matching thread ( I used black here so you can see it easier) tack all the way round but don't cut of the thread as you will need it again in a minute. Pull the thread with the needle still attached  and gather until you get it to look like a petal:
Now stitch back through from one end to the other until the petal is as tight as you can get it, you can adjust the pleats as you go, repeat this with your second strip.

 Place the two halves together back to back and stitch together making sure they are secure.
Take your small piece of material and fold the top and bottom half to the middle and then fold again so you have a strip that measures 15mm (1/2").
Place this central over the two pieces you lovingly stitched together earlier and then turn over and tuck one side under and keep it tight and then stitch to secure.
Nearly done all you have to do now is add your cute button to the centre band and then attach this to your  haircomb and there you have it. I added a beautiful little rhinestone vintage button to finish.


Now that I have put this together this with the black thread I won't sell it and I have no intention of unpicking it all to start again. So here's the plan.
GIVEAWAY

If you would like to have this for yourself or for a friend. All you have to do is this.
1.Follow my blog and then tell me why you would like it for yourself and where would you wear it, and if for a friend, why you think they would like it.

Now how easy is that? I will run this for a week (ends on  the 24th May).If nobody enters for it I  guess I might have to take the black stitches out afterall, save me the trouble please, I don't like unpicking:) I will choose the best story. If you do decide to make one I would love to see it.
ps: the black stiches will not be seen when worn, just thought I would mention that.

Just made this one with organza this time and doubled the layers. The second set of petals I made the same length and reduced the width by 15mm (1/2") so it would sit inside the other.

*******Death of a Sheet*******


Well that's it, it's over, finished after 41 years of faithful service to me, family and friends. My sheet is dead :(. You might think me mad but the reason I loved this sheet so much was I was there at it's birth.  I was 17 when I  watched my mother lovingly zig zagging all the edges. I never did tell her how much I disliked the colour  and might add I still don't.  Despite the colour I have used them all the same, and I think my mama would be pleased. But last night I managed to poke my toes through the sheet at least three if not four times.
My daughter suggested that I make something out of the good part but somehow I know that will not happen.
So farwell my trusty sheet and thank you mama.xx


Saturday, May 7, 2011

Helicopter,Tree Frog, Glass of Wine & a Peony Rose


On discovering the above picture on the grand kids bedroom wall. I asked Stevie (4) "Did you draw the helicopter on the wall"? his reply, "No Nana and it's a boat"!! classic what a great response. I had to leave the room quickly as my sides were hurting trying not to laugh. I have not yet washed or painted it over  as it still makes me smile, piloted by the handsome Jack Skelliton by the looks of it.

Meanwhile on my daily mission in searching for snails on my hosta, it took me a few minutes to see this little fella who obliged me by waiting till I went and fetched the camera and then he sat up nicely for the pose.


This morning I was rewarded by the peony rose's opening and basking in the sun.
Finally, the other night as I was having a glass of wine, the sun filtered through the stem and created an amazing image through the glass, so after taking a picture. I then played with it in photo shop, looks like some wierd bubbling cocktail! and I think I might have had one glass to many!


Thursday, May 5, 2011

Trapped in Ice with a Lemon Sorbet


I decided to try and make an ice ring with my dried flowers unfortunatley some of the flowers floated to the wrong side and left an empty space,  but you could drape a few mint leaves or petals to cover the gap, nevertheless looks quite pretty. I used a rice ring for the mould but have also tried it with two bowls one placed inside the other which makes it easier to place the flowers. Looks great on the dinner table and I filled this one with a home made lemon sorbet.


Monday, May 2, 2011

Rose Petals Happily Forever +

 I swear that it was end of May last year before I started to dry the rose petals but this year we have had exceptional hot and sunny days and the roses are out and I now have to get cracking to start collecting and drying them. I have tried many ways to retain the colour and smell over the years and there are several ways to do this. So I thought I would show you how I do mine. Anyway I will give a small bag (decent size) of my pot-pourri to the first 3 people to ask for it. All I ask is that you pay the postage of 3€ worldwide offer. 3€ is the standard int.Standard package.


For example if I am drying rose petals for pot- pourri then I scatter the rose petals on a microwave safe plate. Microwave for one minute. If the petals are still damp, microwave at one-minute intervals until dry. They come out looking like this, as you can see the white has gone brownish but that's fine as they will be going into bags and the smell is not lost. I have my own blend for pot-pourris and if you would like it then just ask and I will give it to you.
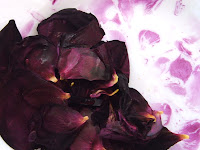
The red petals shown below I dried in the microwave (this one took 3 minutes) and you can see it progressivly getting darker becoming almost black.  Not a good choice for throwing at the Bride & Groom as any chance of dampness and they will stain clothes quicker than you can say Jack Rabbit. You can see the stains on the plate on the 3rd picture.
1 minute in microwave

2 minutes
 
3 minutes and dry
You can also dry the petals by spreading them onto tissue paper or on wire screen. Put them where they will get plenty of ventilation but not be disturbed by breezes. An enclosed patio or spare room is a good choice. Stir them very occasionally to dry evenly. This takes several days to complete. I don't recommend drying them in direct sunlight as I found out to my cost they lose their perfume.
Pressed petals. If you have one or two special roses from a gift bouquet, you can press the petals. Pluck the petals out and put them between paper towels. Put a book or board on them to press the petals as they dry, alternatively  use a flower press I have successfully dried many varities this way. Great for making your own cards or for creating a picture.


  To get flat petals that will also retain their colour, lay onto a linen sheet placing them in a single layer. For petals with a little curl to the edges, lay them the curling side down but pull out the curl as best you can and just pat them into place. Bit fiddly but worth it, cover the petals with another sheet and gently tamp down. Leave them alone for a few days and they will dry mostly flat and without much shrinkage. You will need a reasonable sized area to achieve this if you have a lot. As you can see they have stayed white. These are then perfect for throwing at the Bride & Groom.


Depending on what colour the roses are will determine if you want to dry them or not. White roses generally dry to a cream but use above method and they will stay white. Yellow roses dry beautiful,below are Rosa Banksia dried and still very yellow. Pinks & rose coloured generally dry well and some reds will dry so dark they look black as I mentioned earlier.


 Right must dash and hope the above helps if you were thinking of trying it for yourself. And if you have another way of doing it I would be happy to hear it.
Related Posts Plugin for WordPress, Blogger...